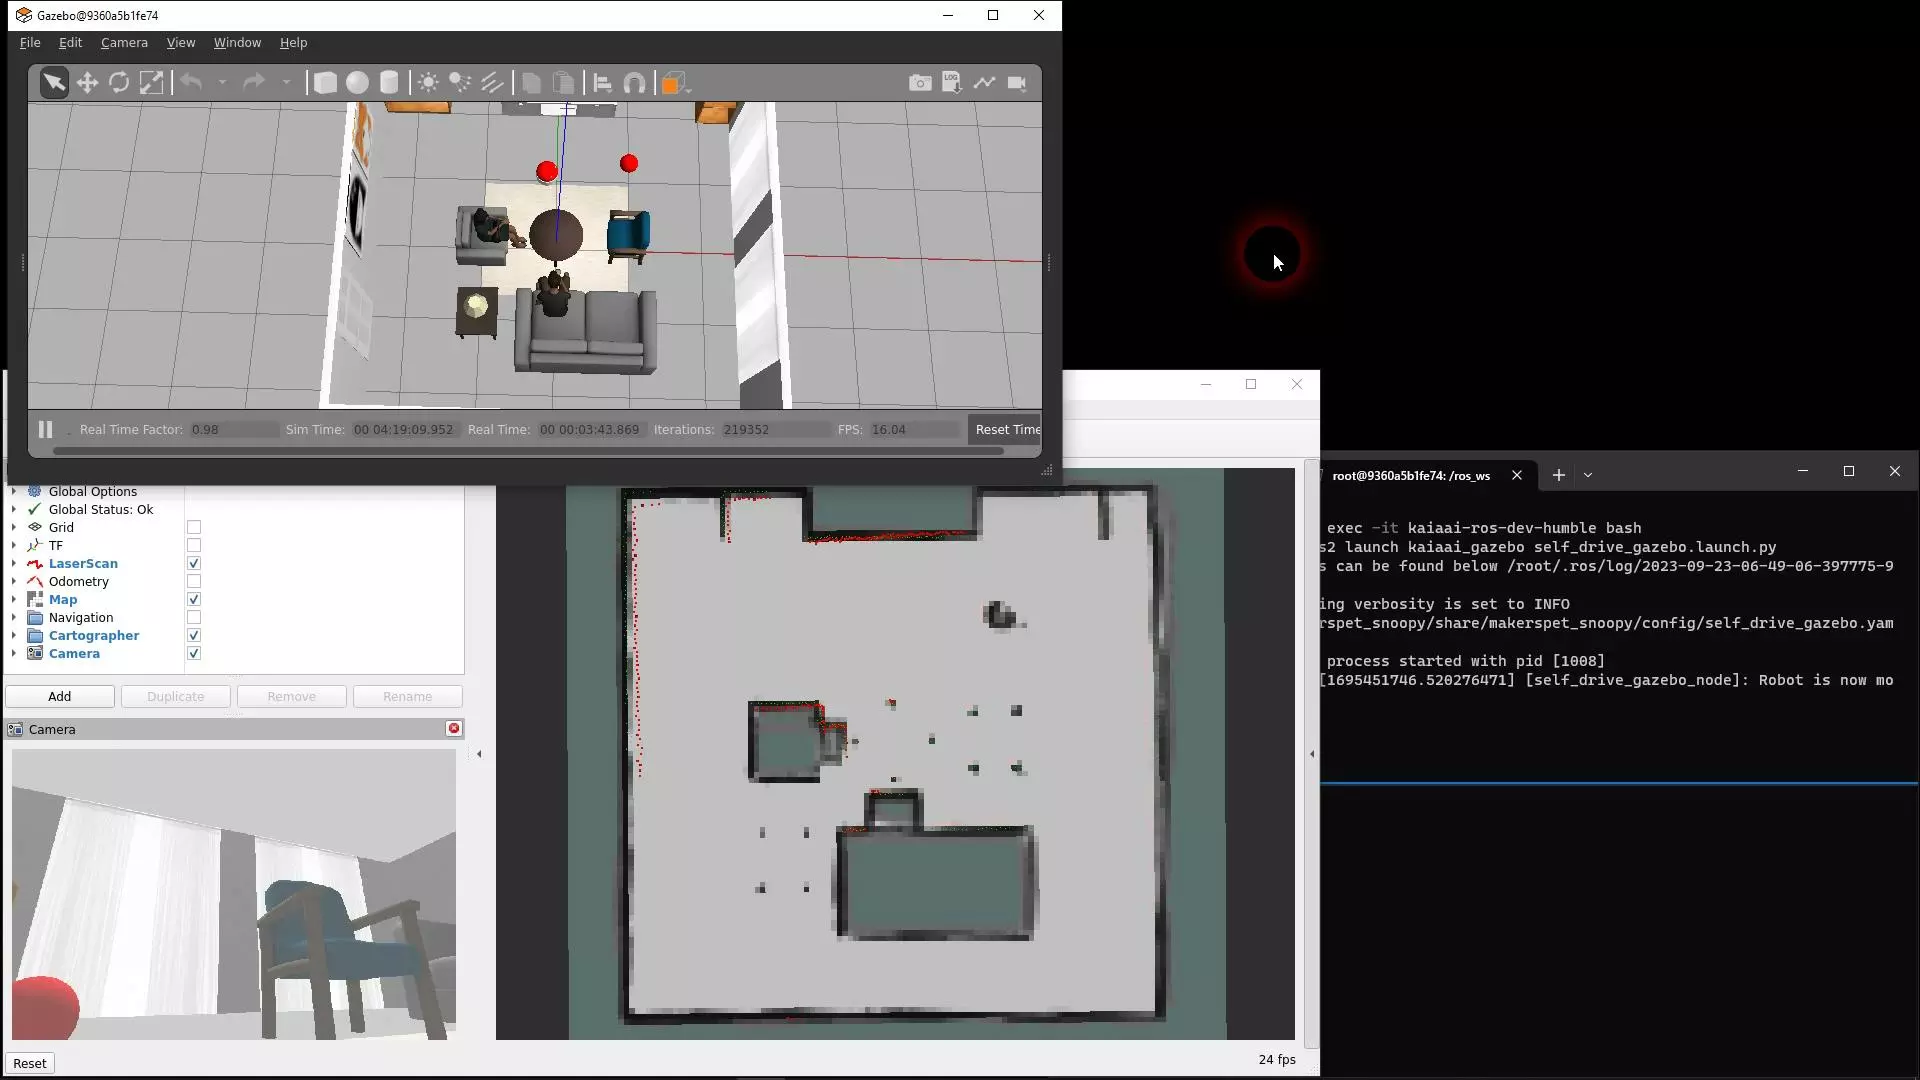
Tutorial: Map, navigate a 3D simulated room in ROS2 Gazebo

Here is a step-by-step tutorial creating a map of the room and navigating around the room using the newly-created map. The simulation runs in ROS2 Gazebo. I’m using here a Windows PC running ROS2 in a Docker container. You can use a Linux PC running Docker as well.
If you are using a Windows PC, make sure to set up your Windows PC folliwing these instructions here.
If you are using a Linux PC, please install Docker for your Linux distro.
The (simple) self-driving code is here.
Tutorial: Step-by-step mapping, navigation in 3D VR Gazebo simulation
Here are the steps.
- Launch Docker for Windows on your local Windows PC.
- Launch VcXsrv on your local Windows PC.
- Pull the Kaia.ai developer Docker image to your local PC.
1
docker pull kaiaai/kaiaai-ros-dev:humble
- Launch the Kaia.ai developer Docker image on your local PC.
1
docker run --name kaiaai-ros-dev-humble -it --rm -p 8888:8888/udp -e DISPLAY=host.docker.internal:0.0 -e LIBGL_ALWAYS_INDIRECT=0 kaiaai/kaiaai-ros-dev:humble
- Launch the Kaia.ai Living Room world with Snoopy-the-robot inside.
1
ros2 launch kaiaai_gazebo world.launch.py
- Open a new shell window and start a new
bashsession in the Docker container.1
docker exec -it kaiaai-ros-dev-humble bash
- In the newly opened window, launch Google Cartographer to start creating a map of the room.
The Cartographer launch script also opens the Rviz2 ROS2 viewer to view the map.
1
ros2 launch kaiaai_bringup cartographer.launch.py use_sim_time:=true
- At this point you should be seeing Snoopy’s camera feed and laser scan data
- Open yet another new shell window and start yet another new
bashsession in the Docker container.1
docker exec -it kaiaai-ros-dev-humble bash
- Launch a self-drive script in the newly created bash session.
1
ros2 launch kaiaai_gazebo self_drive_gazebo.launch.py
- Let Snoopy self-drive itself around the room, creating the map as it goes
- Press
CTRL-Cto stop Snoopy’s self-driving script. - Save the newly-created map.
1
ros2 run nav2_map_server map_saver_cli -f $HOME/my_map
- Press
CTRL-Cto stop Google Cartographer in the Cartographer’s shell window. - Press
CTRL-Cstop Rviz2 in Rviz2 shell window. - Launch ROS2 Navigation and load the newly-created map. This launch script also opens a new Rviz2 window.
1
ros2 launch kaiaai_bringup navigation.launch.py use_sim_time:=true map:=$HOME/my_map.yaml
- Manually specify Snoopy’s location on the map in Rviz2.
- Click the
2D Pose Estimatebutton in the Rviz2 toolbar. - Click-and-hold on the map at Snoopy’s (approximate) current location.
- Drag the mouse in the (approximate) direction Snoopy is currently facing.
- Release the mouse button.
- Click the
- Manually specify the location where you want Snoopy to navigate.
- Click the
Nav2 Goalbutton in the Rviz2 toolbar. - Click-and-hold on the map where you want Snoopy’s to move automatically.
- Drag the mouse in the direction you want Snoopy to be facing once it arrives.
- Release the mouse button.
- Click the
- At this point Snoopy should navigate to the desired location automatically.
- The Nav2 panel on the left in Rviz2 displays the status of navigation.
- You can configure Snoopy’s self-driving behavior - including its speed
and how tight of a path it is willing to follow - in
this file.
- If Snoopy gets stuck in a tight place, try playing with the
checkparameters in this file. - Please keep in mind that the self-driving code is quite rudimentary and may not work well when the space is cluttered.
- If Snoopy gets stuck in a tight place, try playing with the
- Also, please keep in mind that Snoopy uses an inexpensive laser distance scanner to keep the overall project costs affordable. An inexpensive laser scanner like this cannot sense obstacles above or below its scanning plane. For example, Snoopy cannot see obstacles that have a short height. You can work around this limitation by manually placing objects - on the floor - that are tall enough for Snoopy to “see” and avoid. This works both for the real-world operation and simulations.
 Get an early launch invite from us, subscribe to our newsletter