Tutorial: Map, navigate your room in real time - ROS2

Here is a step-by-step tutorial creating a map of the room and navigating around the room using the newly-created map in real time. I’m using here a Windows PC running ROS2 in a Docker container. You can use a Linux PC running Docker as well.
If you are using a Windows PC, make sure to set up your Windows PC folliwing these instructions here.
If you are using a Linux PC, please install Docker for your Linux distro.
The (simple) self-driving code is here.
Tutorial: Real-time mapping
Here are the steps.
- Launch Docker for Windows on your local Windows PC.
- Launch VcXsrv on your local Windows PC.
- Pull the Kaia.ai developer Docker image to your local PC.
1
docker pull kaiaai/kaiaai-ros-dev:humble
- Launch the Kaia.ai developer Docker image on your local PC.
1
docker run --name kaiaai-ros-dev-humble -it --rm -p 8888:8888/udp -e DISPLAY=host.docker.internal:0.0 -e LIBGL_ALWAYS_INDIRECT=0 kaiaai/kaiaai-ros-dev:humble
- Launch the telemetry.
1
ros2 launch kaiaai_bringup main.launch.py
- Open a new shell window and start a new
bashsession in the Docker container.1
docker exec -it kaiaai-ros-dev-humble bash
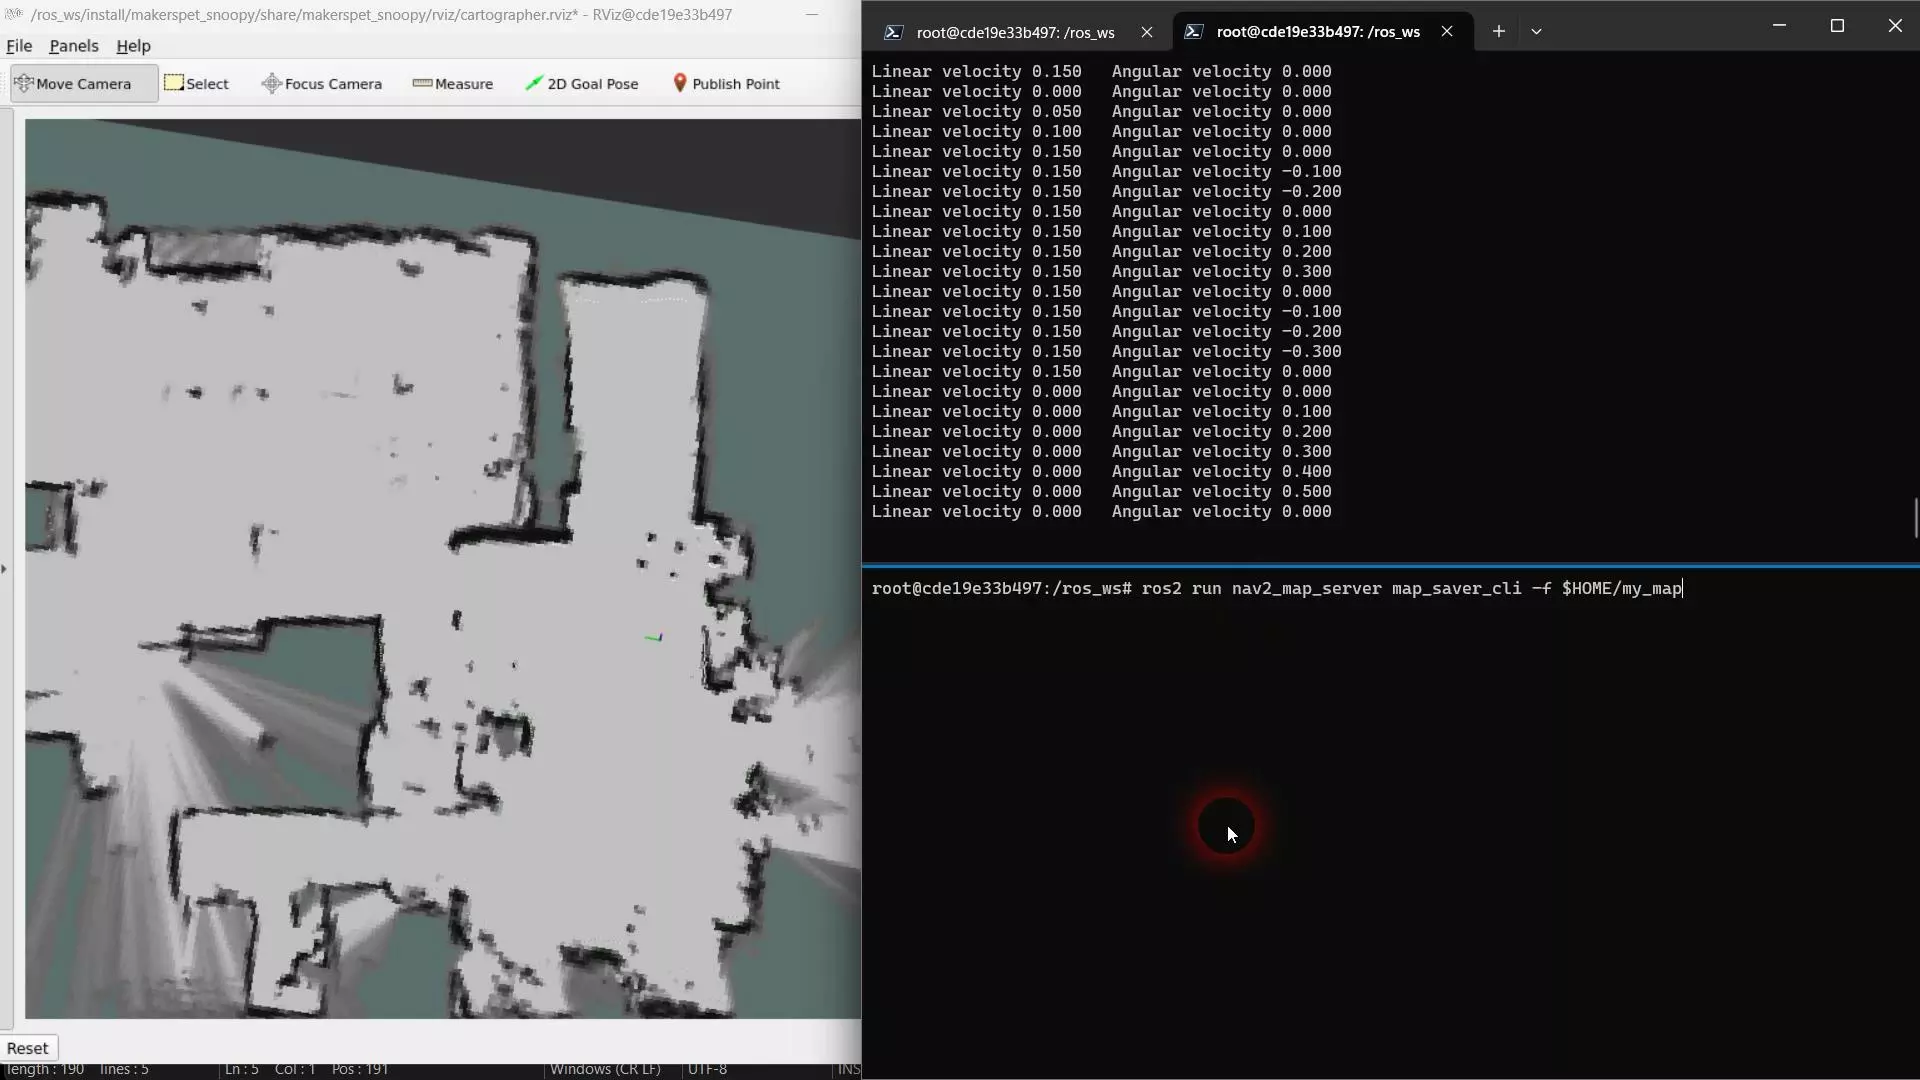
- In the newly opened window, launch Google Cartographer to start creating a map of the room.
The Cartographer launch script also opens the Rviz2 ROS2 viewer to view the map.
1
ros2 launch kaiaai_bringup cartographer.launch.py
- At this point you should be seeing Snoopy’s laser scan data
- Open yet another new shell window and start yet another new
bashsession in the Docker container.1
docker exec -it kaiaai-ros-dev-humble bash
- Launch the keyboard teleoperation script in the newly created bash session.
1
ros2 run kaiaai_teleop teleop_keyboard
- Drive Snoopy around the room, creating the map as it goes.
- Press
CTRL-Cto stop Snoopy’s keyboard teleoperation script. - Save the newly-created map.
1
ros2 run nav2_map_server map_saver_cli -f $HOME/my_map
- Press
CTRL-Cto stop Google Cartographer in the Cartographer’s shell window. - Press
CTRL-Cstop Rviz2 in Rviz2 shell window.
Tutorial: Real-time navigation
Here are the steps.
- Launch Docker for Windows on your local Windows PC.
- Launch VcXsrv on your local Windows PC.
- Pull the Kaia.ai developer Docker image to your local PC.
1
docker pull kaiaai/kaiaai-ros-dev:humble
- Launch the Kaia.ai developer Docker image on your local PC.
1
docker run --name kaiaai-ros-dev-humble -it --rm -p 8888:8888/udp -e DISPLAY=host.docker.internal:0.0 -e LIBGL_ALWAYS_INDIRECT=0 kaiaai/kaiaai-ros-dev:humble
- Launch the telemetry.
1
ros2 launch kaiaai_bringup main.launch.py
- Open a new shell window and start a new
bashsession in the Docker container.1
docker exec -it kaiaai-ros-dev-humble bash
- In the newly-opened shell, launch ROS2 Navigation and load the newly-created map.
This launch script also opens a new Rviz2 window.
1
ros2 launch kaiaai_bringup navigation.launch.py map:=$HOME/my_map.yaml
- Manually specify Snoopy’s location on the map in Rviz2.
- Click the
2D Pose Estimatebutton in the Rviz2 toolbar. - Click-and-hold on the map at Snoopy’s (approximate) current location.
- Drag the mouse in the (approximate) direction Snoopy is currently facing.
- Release the mouse button.
- Click the
- Manually specify the location where you want Snoopy to navigate.
- Click the
Nav2 Goalbutton in the Rviz2 toolbar. - Click-and-hold on the map where you want Snoopy’s to move automatically.
- Drag the mouse in the direction you want Snoopy to be facing once it arrives.
- Release the mouse button.
- Click the
- At this point Snoopy should navigate to the desired location automatically.
- The Nav2 panel on the left in Rviz2 displays the status of navigation.
- You can configure Snoopy’s autonomous navigation behavior - including its speed and how tight of a path it is willing to follow - in this file.
- Please keep in mind that Snoopy uses an inexpensive laser distance scanner to keep the
overall project costs affordable.
- An inexpensive laser scanner like this cannot sense obstacles above or below its scanning plane. For example, Snoopy cannot see obstacles that have a short height.
- You can work around this limitation by manually placing objects - on the floor - that are tall enough for Snoopy to “see” and avoid. This works both for the real-world operation and simulations.
 Get an early launch invite from us, subscribe to our newsletter